Appearance
Create a CNAME with Google Domains
To utilize our inbound proxies you will need to setup a CNAME from the hostname you own to our Inbound Proxy domain.
First navigate to your inbound proxy and find the DNS Settings section. This section will contain the information you need to create your CNAME.
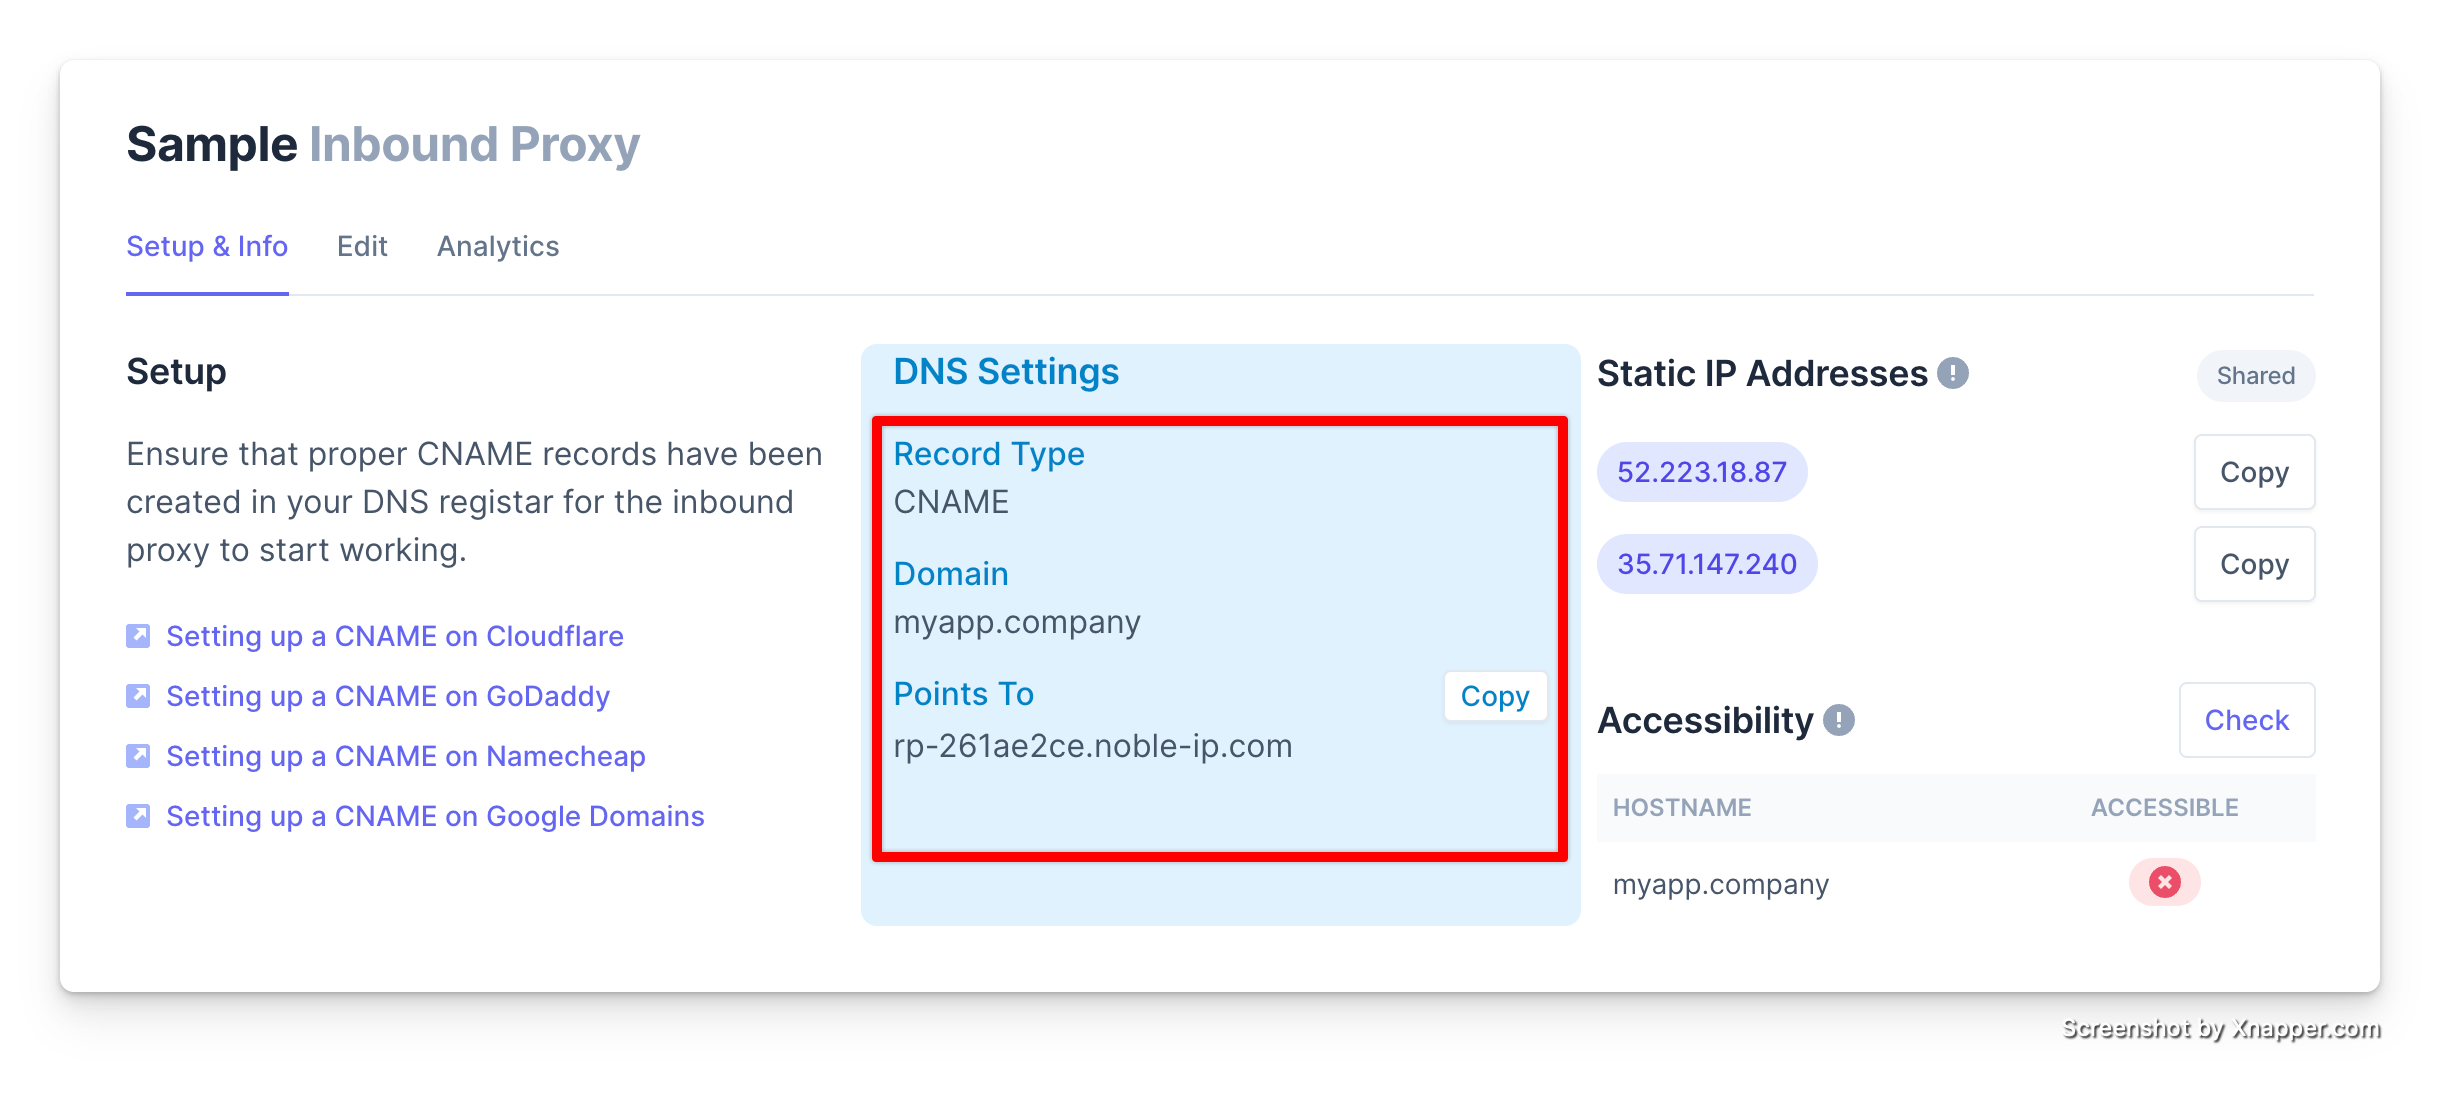
In your Domain provider you will create a CNAME record that points to the domain shown in the Points To section of the DNS Settings.
Instructions
Log in to your Google Domains account.
Click on the domain that you’d like to update with a CNAME record.
On the left, select the menu icon
 , followed by the DNS
  . A new page will appear.
Scroll down until you see the Custom resource records section.
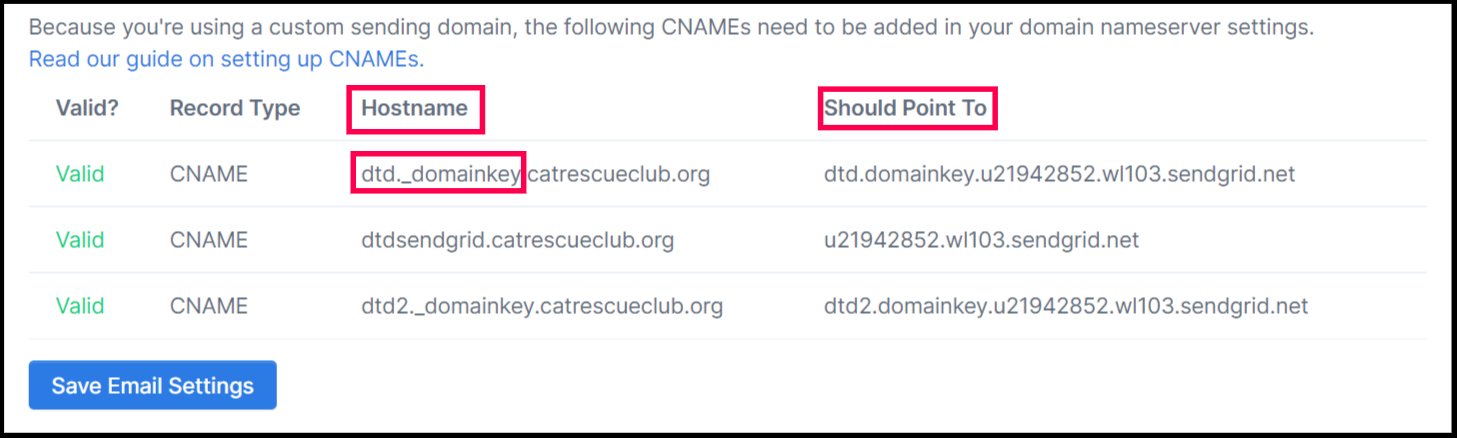
In the Name field, enter the Hostname you have specified in the reverse proxy.
NOTE: Only include the portion before .yourdomain.org in the entry. Google Domains will automatically populate your domain on the end of the Hostname.
In the Type drop-down menu, select CNAME.
In the TTL field, enter 1H.
In the Data field, paste in the Should Point To value from the
Points Tofield in your dashbaord.
Click the Add button, then repeat the process for the all the hosts name in your reverse proxy.