Appearance
Heroku Static IPs with Noble IP
Heroku is a PaaS platform for quickly deploying apps. To make sure you can access firewalled or secure resources you can leverage Noble IP proxies to route traffic from a static IP.
HTTPS Proxy
If you need to access an HTTP/HTTPS API from your Heroku app, you can use a Noble Outbound proxy.
Start by signing up for an account and accessing the dashboard.
- Navigate to the
Outbound Proxiestab and selectCreate Outbound Proxy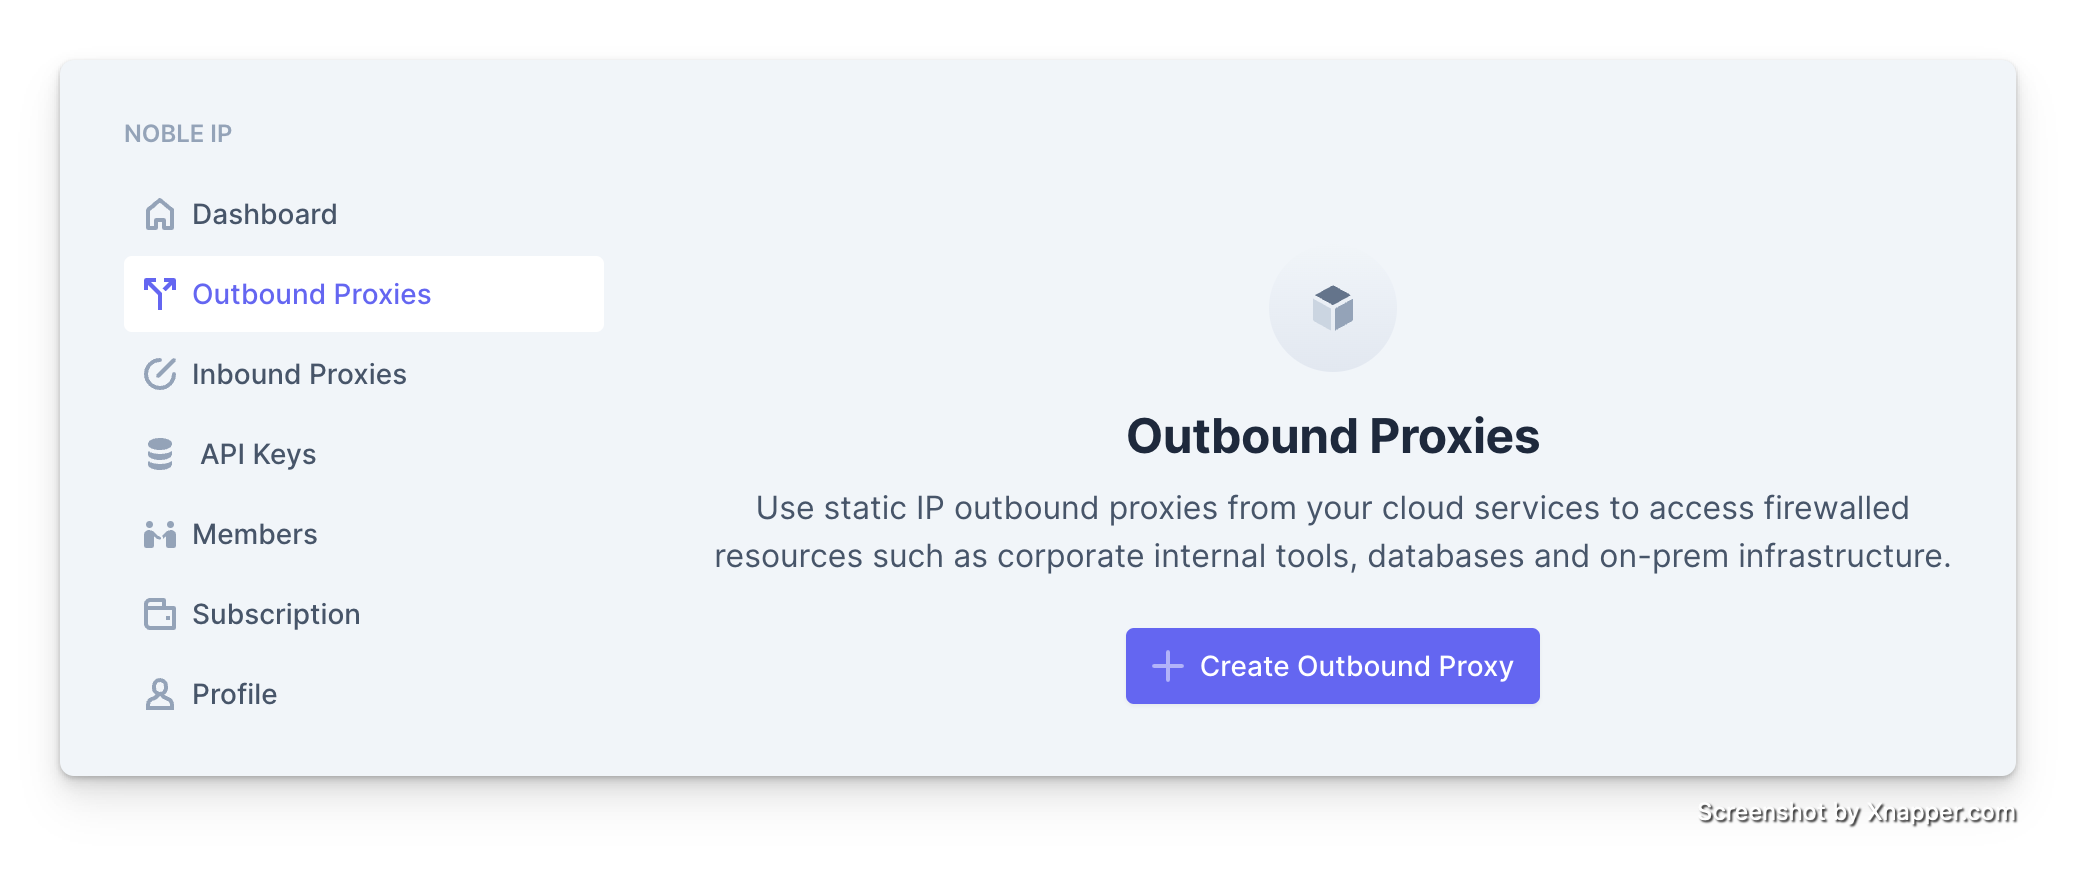
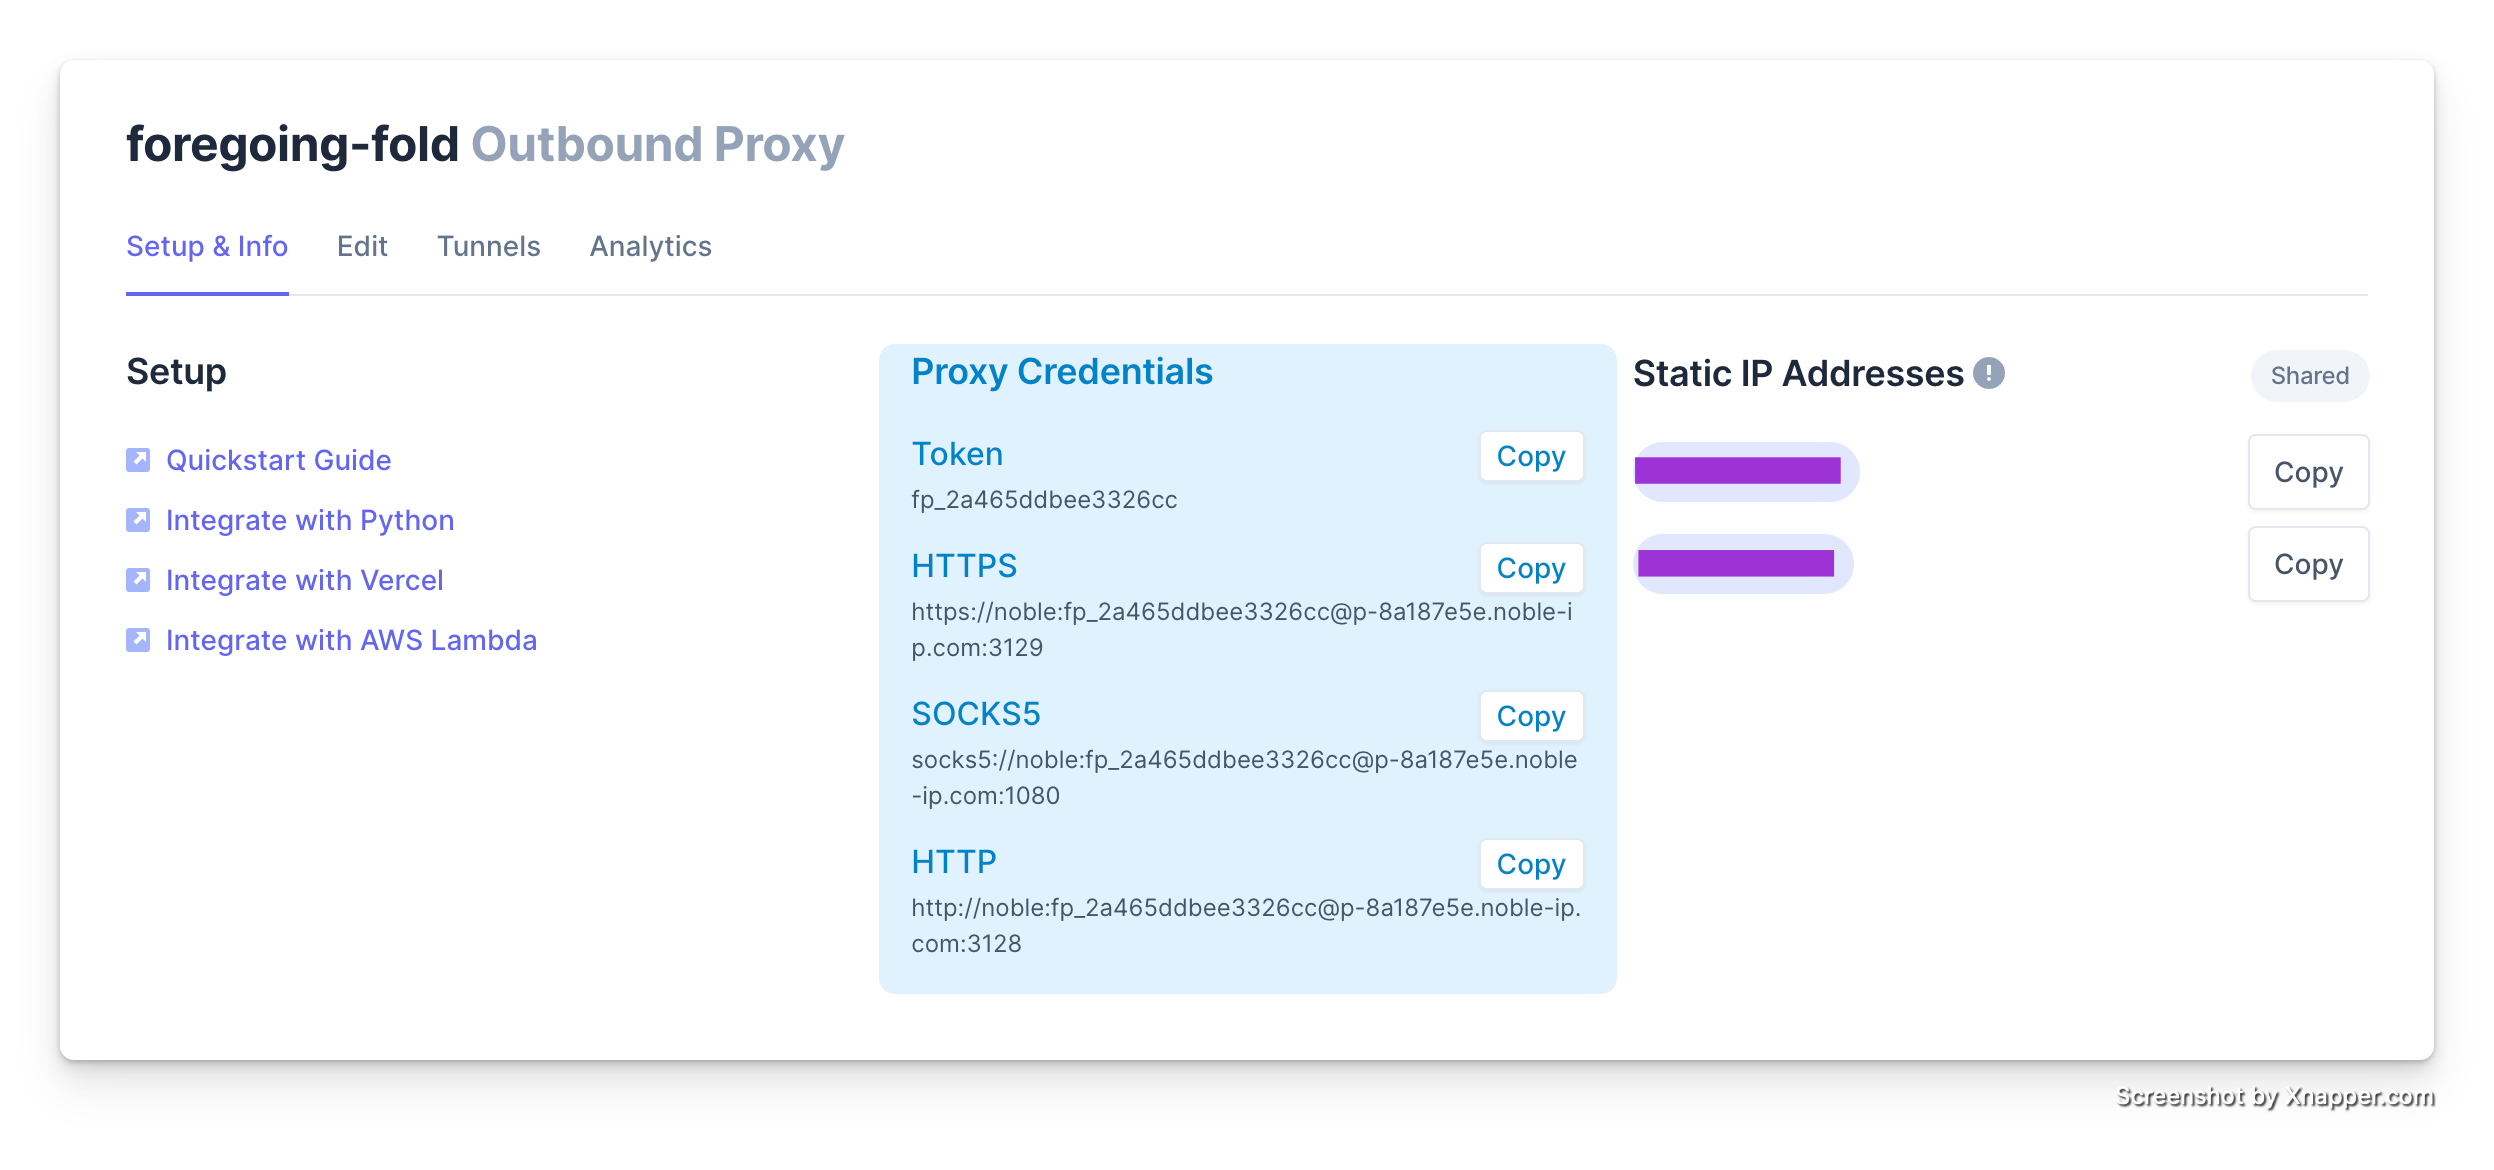
- Once the proxy is created you will get 2 static IP address. You will need to white list both addresses. We provide 2 addresses for high availablity, in case one became unreachable, your service can failover to the other one.
- Make note of the Proxy Credentials. You will need this to utilize your proxy.
TIP
Explore our documentation for indepth guides on intergrating with your language or platform of choice.
Once you have created the proxy, you will need to update your requests to utilize the proxy.
js
import fetch from "node-fetch";
import { HttpProxyAgent } from "hpagent";
const { HttpProxyAgent } = require("hpagent");
const response = await fetch("https://ifconfig.me/ip", {
  agent: new HttpProxyAgent({
    keepAlive: true,
    proxy: "https://noble:fp_NOBLETOKEN@p-12345.noble-ip.com:3129",
  }),
});
python
import requests

proxies = {
  'http': 'https://noble:fp_NOBLETOKEN@p-12345.noble-ip.com:3129',
  'https': 'https://noble:fp_NOBLETOKEN@p-12345.noble-ip.com:3129'
}

response = requests.get('https://ifconfig.me/ip', proxies=proxies)
print(response.text)
ruby
require 'net/http'

proxy_url = URI.parse('https://noble:fp_NOBLETOKEN@p-12345.noble-ip.com:3129')
target_url = URI.parse('https://ifconfig.me/ip')

proxy = Net::HTTP::Proxy(proxy_url.host, proxy_url.port, proxy_url.username, proxy_url.password)
response = proxy.start(target_url.host, target_url.port, use_ssl: true) do |http|
  http.get(target_url.path)
end

puts response.body
Access a database, such as MongoDB, from Heroku with a Static IP
If you need to access a TCP service, such as a database via a static IP, Noble IP provides a number of different ways to get started.
Noble Tunnel
You can automatically route all traffic through the noble tunnel. This method works for most applications and does not require any code changes.
Create a new Tunnel
- Navigate to the
Tunnelstab of your proxy and selectCreate Tunnel - Configure the tunnel in the dashboard with the
network wrappermode: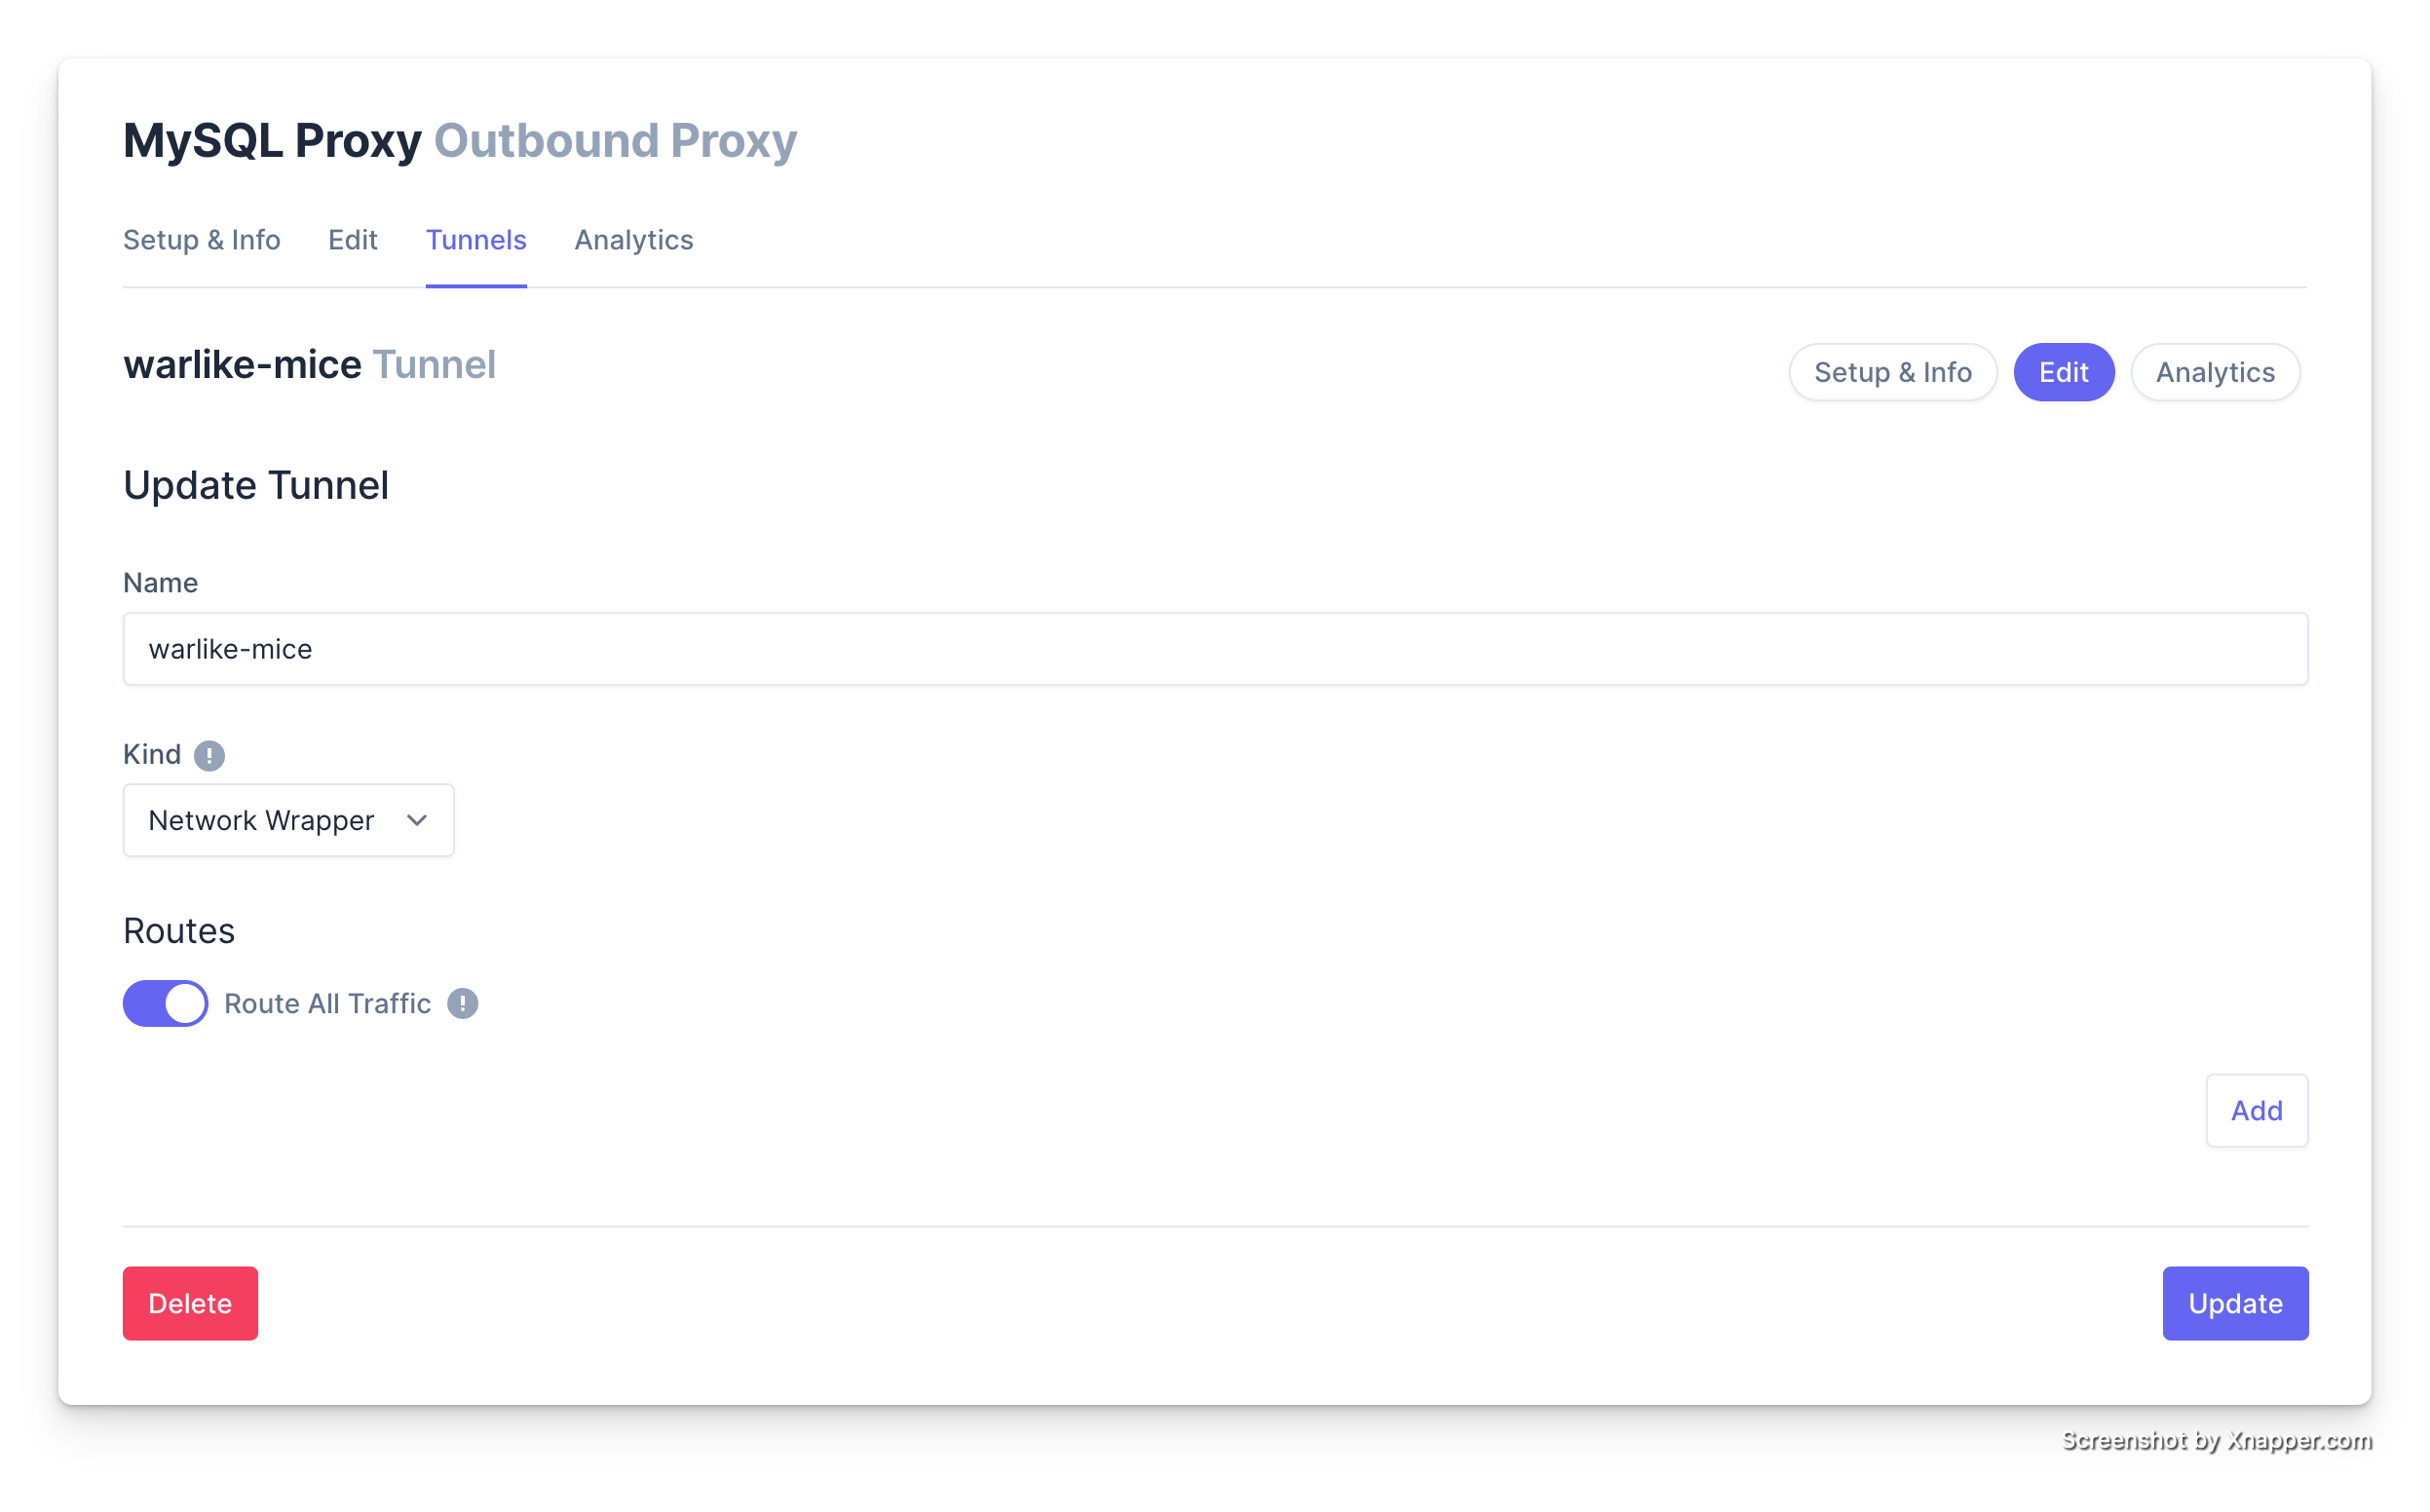
- You can either choose to route all traffic through the proxy, or just specific IPs. Traffic in the private network range, or to localhost will never be routed through the proxy.
Download the Noble Tunnel application
Add Noble Tunnel program to the root directory of your application:
sh
curl -LO https://s3.us-west-2.amazonaws.com/releases.noble-ip.com/artifacts/x86_64-unknown-linux-gnu/noble-tunnel/latest/noble-tunnel
git update-index --chmod=+x noble-tunnel
Add your tunnel credentials to your configuration
Your tunnel token will be in the proxy's tunnel configuration page.
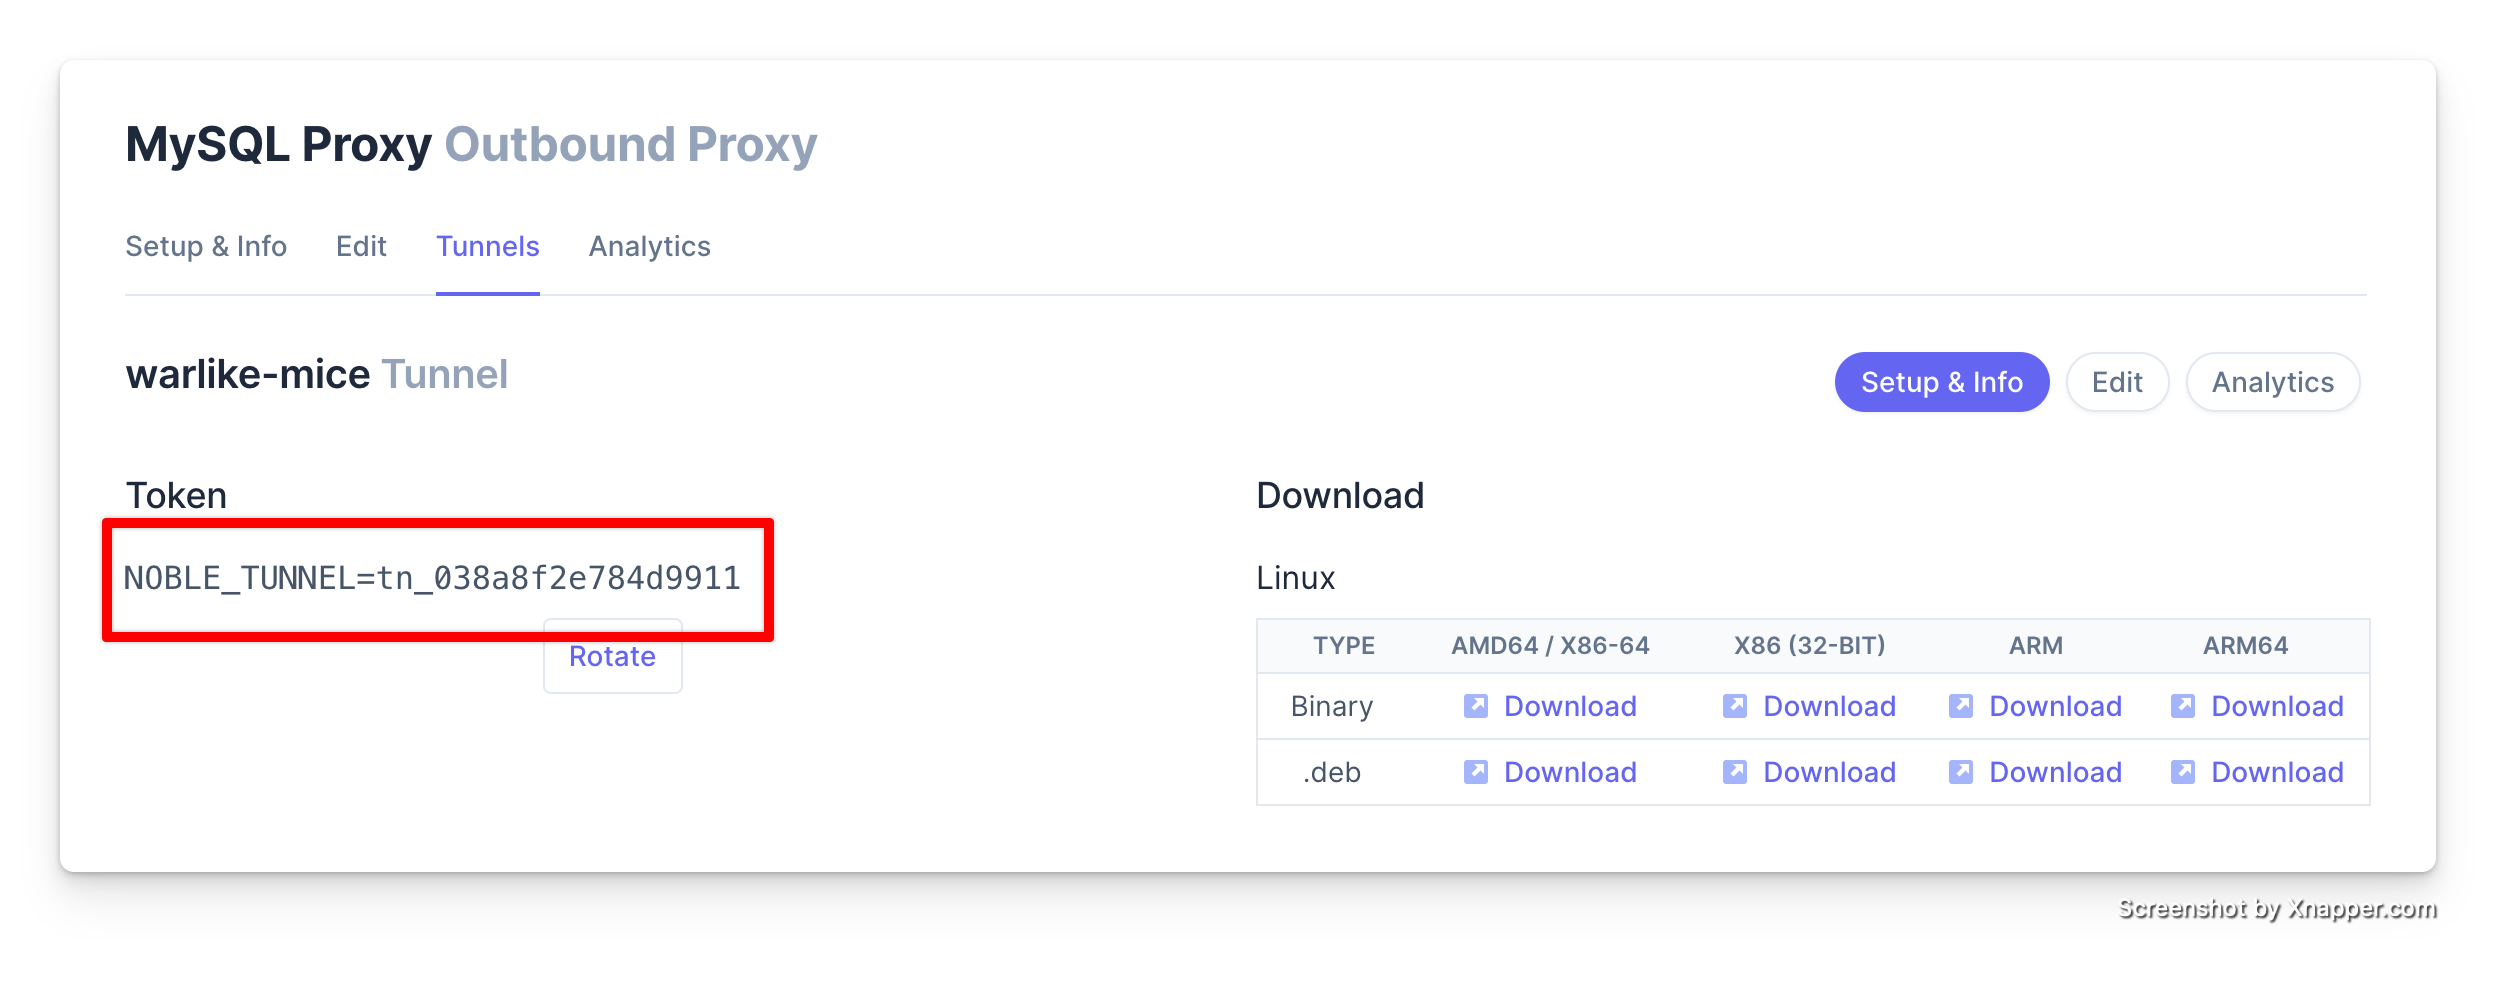
sh
heroku config:set NOBLE_TUNNEL=tn_1234567Modify your procfile
Your procfile will need to launch noble-tunnel.
sh
web: bundle exec rails server -p $PORT // [!code --]
web: ./noble-tunnel -- bundle exec rails server -p $PORT // [!code ++]
Once your app is launched you should be able to track traffic usage in the dashboad.
If you need any help do not hesitate to contact us.