Appearance
Create a CNAME with Namecheap
To utilize our inbound proxies you will need to setup a CNAME from the hostname you own to our Inbound Proxy domain.
First navigate to your inbound proxy and find the DNS Settings section. This section will contain the information you need to create your CNAME.
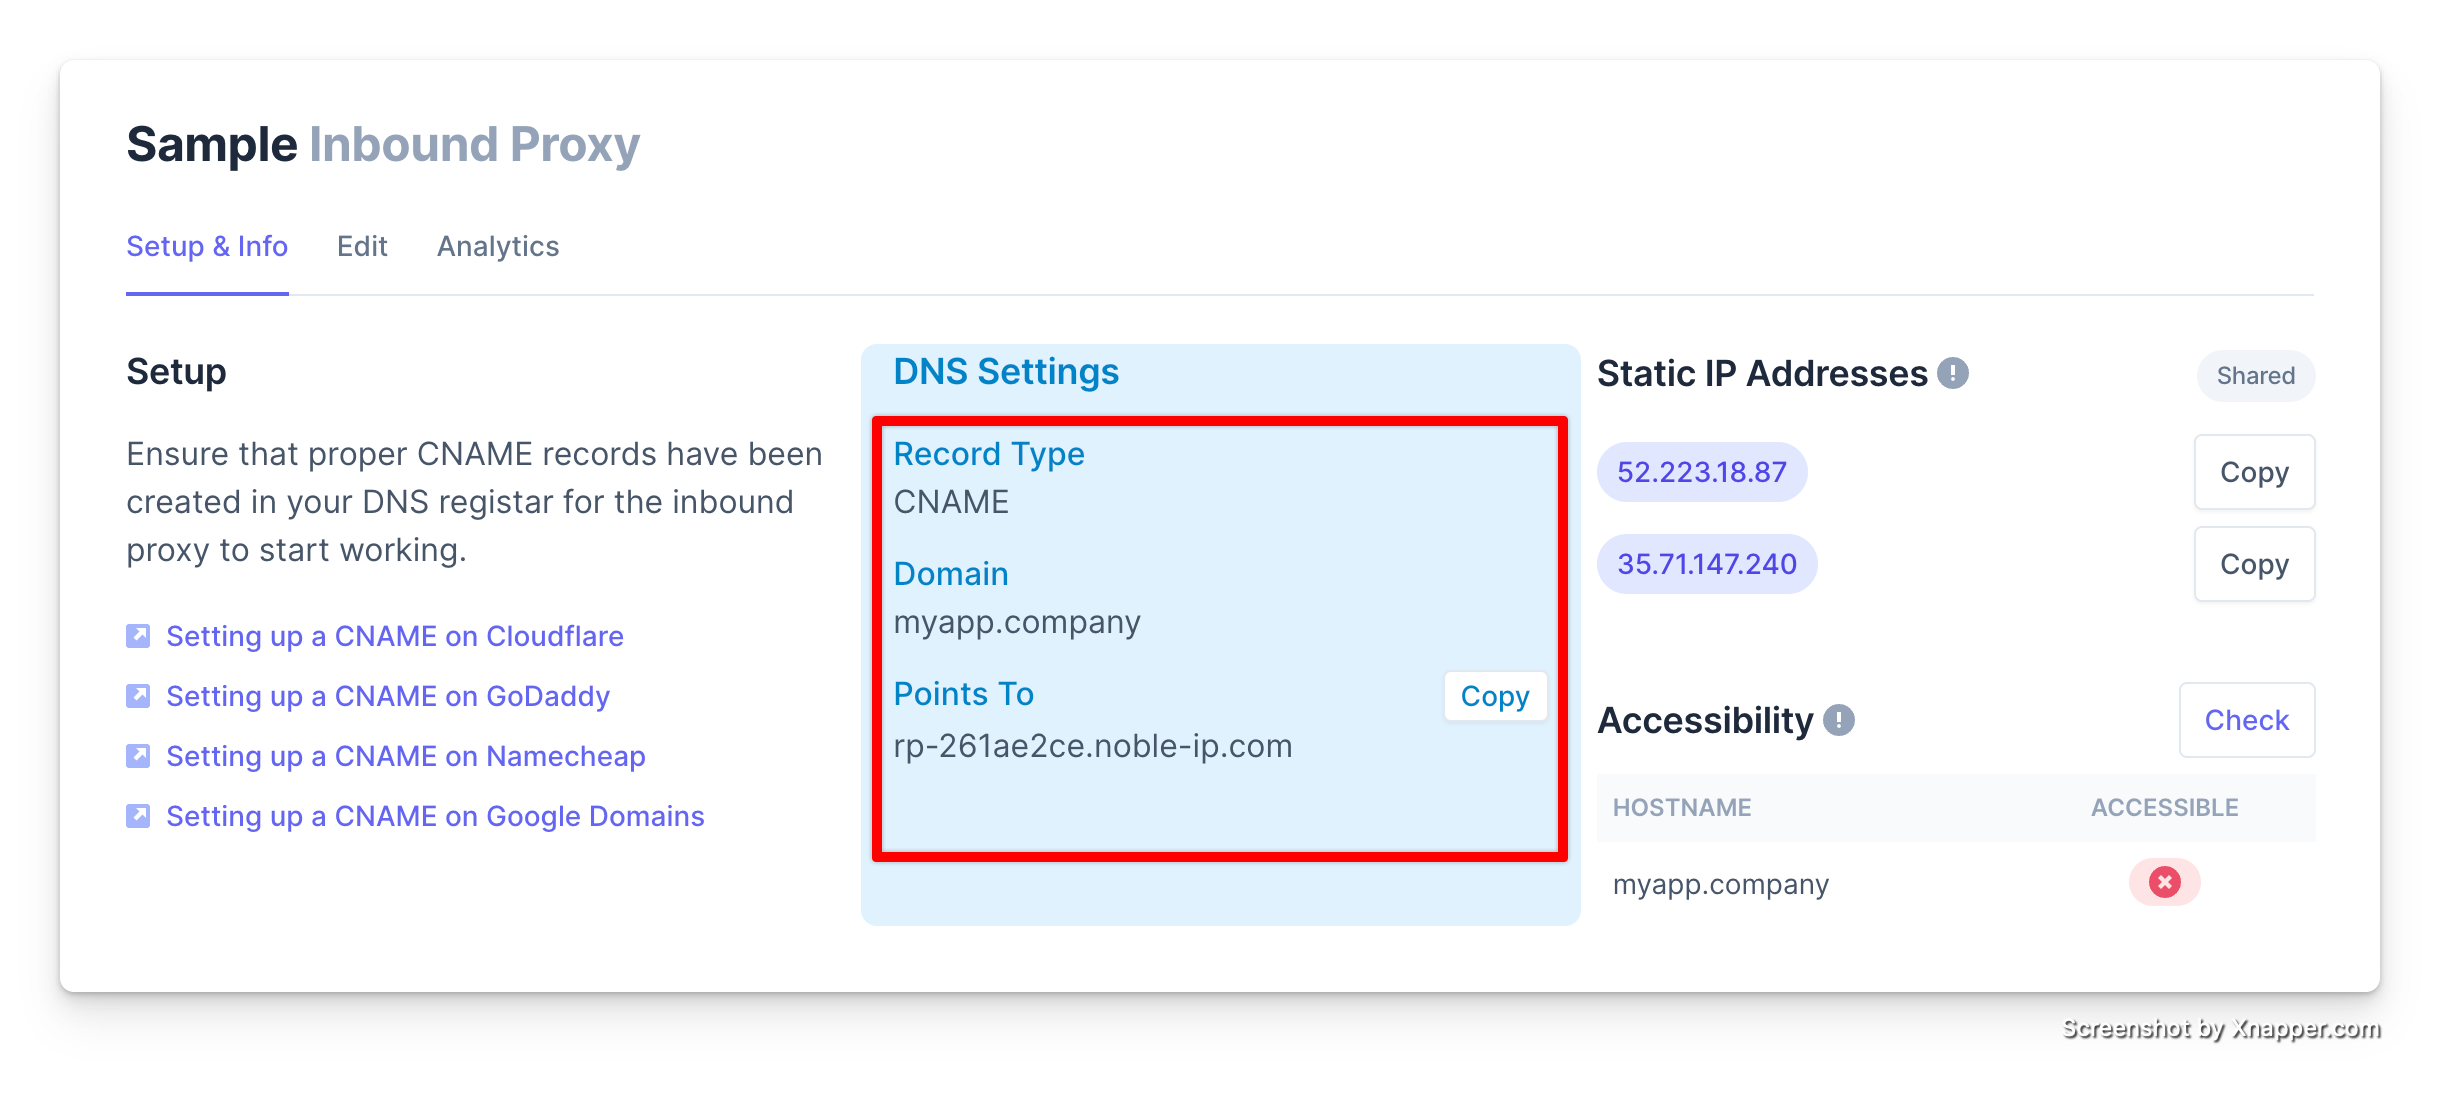
In your Domain provider you will create a CNAME record that points to the domain shown in the Points To section of the DNS Settings.
Instructions
- Log in to your NameCheap account.
- Click the Account drop-down menu and select "Dashboard".
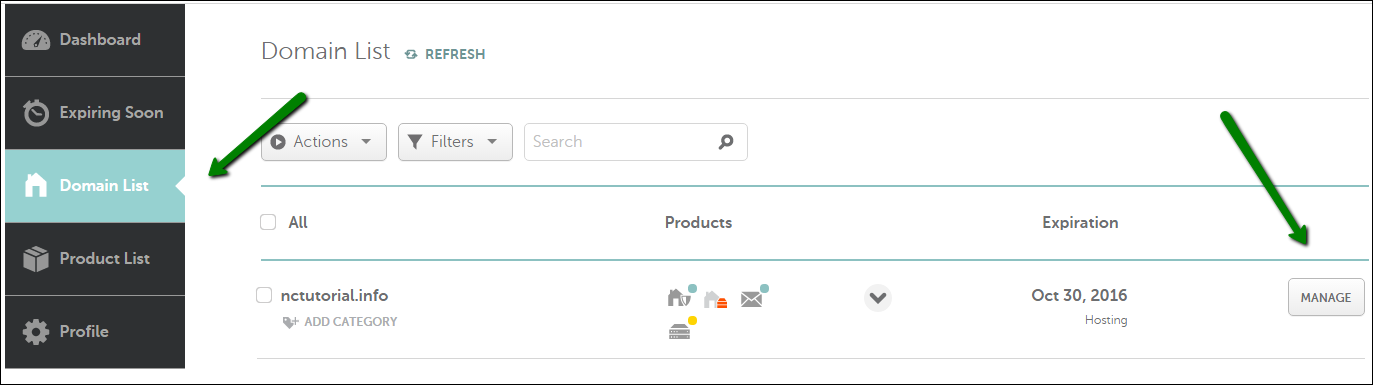
- Click "Domain List" and click the "Manage" button for the domain you wish to set up.
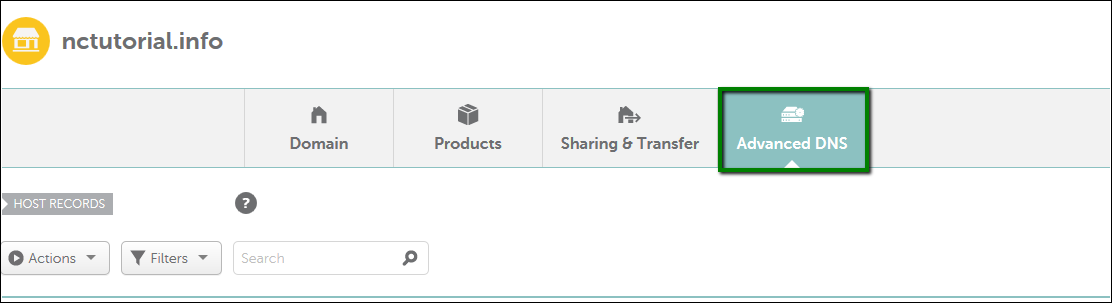
- Click "Advanced DNS".
- Find the Host Records section and click "Add New Record".
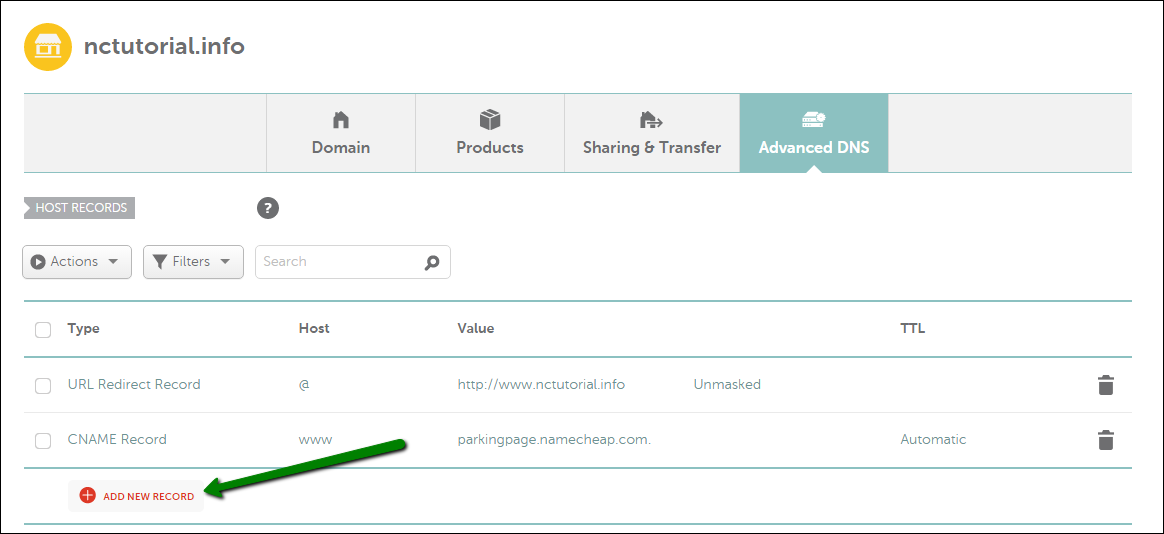
- Select "CNAME Record" from the "Type" drop-down menu.
- Under Host, enter the hostname value you used to create your inbound proxy.
- Under Value, paste in the whole
Point tofrom forDNS Settings - Click "Save all changes" and then repeat the process for any remaining hostnames.
For more information, go out NameCheap's guide on creating CNAME records.